Category: Beginning Drawing

  • Drawing supplies

    Drawing supplies

    Pad of good drawing paper (minimum 18โ€ x 24โ€): Drawing paper is the foundation of any drawing. It should have a smooth surface that allows for easy pencil or charcoal application without too much tooth (texture) that might interfere with fine details. A larger size like 18โ€ x 24โ€ provides ample space for experimentation and larger compositions. Brands like Strathmore and Canson offer reliable quality. Alternatives: Students can opt for cheaper alternatives like store-brand drawing pads, but they should ensure the paper is of sufficient quality to handle various drawing mediums without tearing or buckling.

    Pad of newsprint or craft paper (minimum 18โ€ x 24โ€): Newsprint or craft paper is ideal for quick sketches, gesture drawings, and practicing without worrying about wasting expensive paper. It’s cheaper than drawing paper and encourages students to sketch freely without inhibition. Alternatives: Students can use recycled paper or even old newspapers for practice sketches if they’re extremely tight on budget.

    Toned paper (blue, gray, earth colors, 3 pieces): Toned paper adds depth and atmosphere to drawings, especially when working with charcoal or white pencils. It can enhance contrast and help students explore different tonal ranges. Alternatives: Students can make their own toned paper by using inexpensive colored construction paper or by tinting white paper with diluted acrylic paint.

    Tracing paper (budget grade, can be shared): Tracing paper is useful for transferring sketches or refining compositions without damaging the original drawing. It’s lightweight and translucent, allowing for easy tracing and experimentation. Sharing one pad among students can reduce costs. Alternatives: Students can use thin parchment paper or even wax paper as a cheaper alternative for tracing.

    Sketchbook (no larger than 9โ€ x 12โ€ and no smaller than 5โ€x7″): A sketchbook provides a portable space for students to jot down ideas, observations, and quick sketches wherever they go. The size restrictions ensure it’s convenient to carry around. Alternatives: Students can use any blank notebook or even make their own sketchbooks by binding loose sheets of paper together.

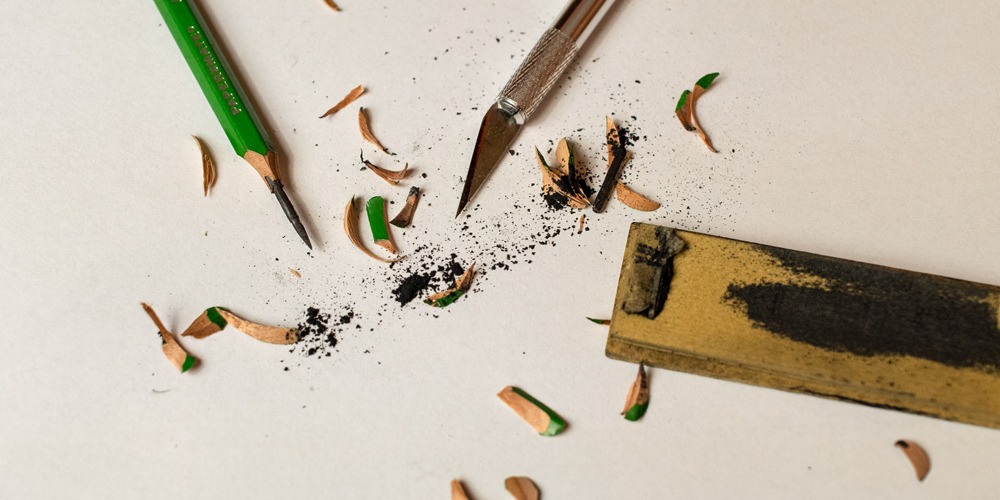
    X-Acto knife: An X-Acto knife is essential for precise cutting and detailing, such as sharpening pencils or creating intricate paper stencils. It’s a versatile tool that can aid in various aspects of the drawing process. Alternatives: A sharp utility knife or a razor blade can serve as a budget-friendly alternative.

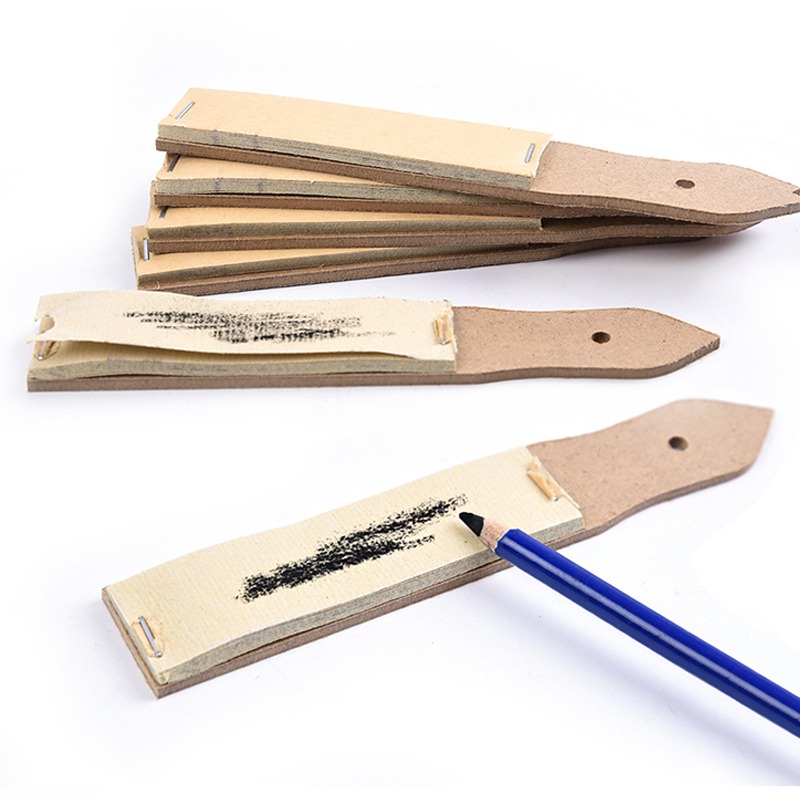
    Sandpaper block or fine sandpaper (medium grit 150 or 220): A sandpaper block is used for sharpening pencils and charcoal sticks to achieve a fine point or edge. It’s an essential tool for maintaining drawing implements. Alternatives: Students can use sandpaper sheets or emery boards as a substitute for a sandpaper block.

    Graphite pencils (4H, 2H, HB, 2B, 4B, 6B or full set): Graphite pencils come in different hardness grades, ranging from hard (H) to soft (B), allowing for varying degrees of line darkness and texture. A variety of grades enables students to achieve a wide range of effects in their drawings. Alternatives: Students can purchase individual pencils of the most commonly used grades (HB, 2B, 4B) rather than a full set to save money.

    Charcoal pencils (hard, medium, and soft): Charcoal pencils offer rich, deep blacks and are ideal for expressive and dramatic drawing. Different grades of charcoal pencils provide varying levels of darkness and control. Alternatives: Students can use compressed charcoal sticks or vine charcoal as a cheaper alternative to charcoal pencils.

    Charcoal white pencils (at least 2): Charcoal white pencils are used for adding highlights and lighter tones to charcoal drawings. They provide contrast and can enhance the three-dimensional quality of the artwork. Alternatives: Students can use white conte crayons or white chalk pastels as substitutes for charcoal white pencils.

    Erasers (Kneaded eraser and White Vinyl Eraser): Kneaded erasers are pliable and can be molded into different shapes for precise erasing and lifting off graphite or charcoal. White vinyl erasers offer more aggressive erasing power and are useful for larger areas. Alternatives: Students can use regular rubber erasers as a substitute for white vinyl erasers, although they may leave more residue.

    Workable fixative: Workable fixative is sprayed on finished drawings to prevent smudging and protect the artwork from dust and fading. It allows students to continue working on their drawings without worrying about damaging them. Alternatives: Students can use hairspray as a budget-friendly alternative to workable fixative, although it may not be as effective or archival.

    Plastic box for supplies: A plastic box provides a convenient storage solution for organizing and transporting art supplies. It helps students keep their materials organized and protected from damage. Alternatives: Students can use any sturdy container or even repurpose household items like shoeboxes for storing their art supplies.

    Optional – blending stumps: Blending stumps are used for smudging and blending graphite or charcoal to create smooth gradients and transitions. They can add depth and dimension to drawings. Alternatives: Students can use rolled-up paper or their fingers as a budget-friendly alternative to blending stumps.
  • How to sharpen a pancil for a drawing

    How to sharpen a pancil for a drawing

    Sharpening Your Pencil for Success: A Guide for Students and Beginners

    When it comes to drawing, especially in the traditional sense, the seemingly simple act of sharpening a pencil can have a profound impact on your work. A properly sharpened pencil is a properly prepared tool for a successful drawing. The right sharpening technique can transform your drawing experience, offering precision, control, and the ability to explore a range of textures and shades. Hereโ€™s a comprehensive guide tailored for students and beginners to help you sharpen your pencil for successful drawing.

    Understanding Pencil Types

    Before diving into sharpening techniques, it’s crucial to understand the types of pencils available to you. Artist-grade graphite pencils have a wide range of values and are labeled with letters โ€œHโ€ for hardness, or โ€œBโ€ for softness. The harder pencils (H series) are great for fine lines and details, while softer pencils (B series) are ideal for dark, rich shadows. Just remember, the harder the lead, the lighter the line and the softer the lead, the darker the line would appear on the paper.

    Graphite Pencils: The Hardness and Softness Spectrum

    Graphite pencils are designated with an ‘H’ for hardness and a ‘B’ for blackness (or softness), with ‘F’ (fine point) and ‘HB’ sitting in the middle of the scale as a balance between hard and soft. The ‘H’ series pencils, ranging from H to 9H, gradually increase in hardness. These pencils are characterized by their light touch and are superb for creating precise, fine lines that are essential for detailed work, technical drawings, and light shading. Their hard leads produce less smudging, making them ideal for clean, crisp lines.

    On the other end of the spectrum, the ‘B’ series pencils, from B to 9B, progressively become softer and darker. These pencils are capable of producing rich, deep shadows and are perfect for adding texture, depth, and intensity to your drawings. Their softer leads allow for smoother shading and blending, making them essential for artists looking to explore dynamic ranges of tones and contrasts.

    Sharpening a pencil with a knife versus using a standard handheld sharpener offers several distinct advantages, particularly for artists and those who require precise control over their drawing tools. Each method has its place, but the knife sharpening technique is celebrated for the level of customization and finesse it brings to pencil preparation. Here are some of the key advantages:

    1. Customized Tip Shape: A knife provides precision in sculpting the pencil to desired shapes and lengths, enabling tailored tip configurations for specific drawing needs. This method also allows for a longer taper, improving line thickness variety and drawing visibility.
    2. Pencil Longevity: Economical wood removal preserves more of the pencil, extending its usability and offering a sustainable option.
    3. Versatility: Knife-sharpening enables the creation of varied tip shapes for diverse textures, shades, and line types, essential for complex compositions.
    4. Reduced Breakage: Gentle handling minimizes the risk of pencil breakage, a common issue with softer pencils in mechanical sharpeners.
    5. Mindfulness and Preparation: The manual sharpening process can be a meditative ritual, fostering a focused and intentional mindset before starting artwork.

    The tools youโ€™ll need:

    The right tools can make all the difference.

    • Knife or Blade: Using a knife or a specially designed artist’s blade allows for more control over the shape and length of the pencil tip. This method is preferred for achieving a longer, tapered point that exposes more of the pencil core.
    • Sandpaper Pad: After shaping your pencil with a knife or sharpener, a sandpaper pad can be used to fine-tune the point to perfection.
    Closeup of 2 X-Acto knives

    The Sharpening Process

    Sharpening with a Knife

    1. Safety First: Always cut away from your body. Hold the pencil firmly in one hand and the knife in the other.
    2. Expose the Core: Gently shave the wood around the pencil core, rotating the pencil to create an even taper. Expose enough of the core to suit your drawing needs (typically around 1/4 to 1/2 inch).
    3. Create the Point: Once the core is exposed, use the knife or a sandpaper pad to shape the tip to your desired sharpness.

    Tips for Success

    • Regular Maintenance: Keep your tools sharp and clean. A dull blade can damage your pencils and affect the quality of your lines.
    • Practice Makes Perfect: Experiment with different sharpening techniques and pencil angles to discover what works best for you and your style.
    • Mind the Mess: Always sharpen your pencils over a trash bin or a sheet of paper to collect the shavings and keep your workspace clean.
    • Explore: Don’t be afraid to try different pencil types and sharpening methods to see how they affect your drawing.

    Sharpening your pencil correctly is a foundational skill that will enhance your drawing experience. It’s not just about making a point; it’s about preparing your tool to best express your vision on paper. As you practice and become more comfortable with these techniques, youโ€™ll find that the quality of your drawings will start to improve, reflecting the care and precision youโ€™ve put into every aspect of your work.

    Considerations

    While the advantages are clear, it’s important to note that knife sharpening requires practice to master and is not without risks, particularly concerning safety. Using a sharp blade demands attention and care to avoid injury. Additionally, this method may not be as convenient or fast as using a handheld sharpener, particularly for those in a classroom setting or for artists who prefer not to carry blades.

    In conclusion, sharpening a pencil with a knife offers a level of customization, precision, and versatility that is unparalleled by standard handheld sharpeners. It appeals especially to artists and professionals who value the quality and specificity of their tools. As with any skill, it becomes more intuitive and effective with practice, making it a worthwhile technique to explore for anyone serious about drawing.

    Happy drawing!

  • Contour Drawing: Definition and Guide

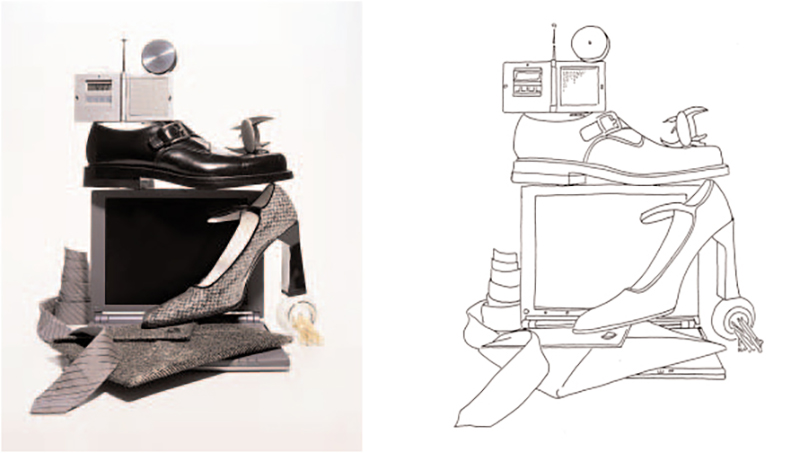
    Contour Drawing: Definition and Guide

    Introduction:

    Contour drawing is one of the fundamental approaches to understanding and capturing the visual world around you into outlines. The ability to translate the observable world around you into an outline will enhance your understanding of form and space, transcending mere representation to capture the essence of the subject. Contour, is one of the seven functions of line, as offered in his definition by a profound American Illustrator, Andrew Loomis. It is not simply an outline, but a way to visually communicate what you see int a three-dimensional world, onto a two dimensional surface.

    Defining Contour Drawing:

    Contour drawing focuses on rendering a subject entirely through its outlines, capturing its form and shapes without incorporating any shading, texture, or tone. It is a type of discipline, an approach that challenges students, and professional artists alike, to focus on the subject at hand, analyzing its form, volume, and space it occupies. It encourages a deeper engagement with the visual world.

    Exercises to Sharpen Your Skills:

    There are three exercises one can do to enhance and elevate oneโ€™s drawing abilities.

    • Blind Contour Drawing: Deepen your observational skills by drawing without looking at the paper, a practice that heightens sensitivity to the subject’s form.
    • Modified Contour Drawing: Introduce brief glances at your work to maintain connection with the paper while still focusing on the subject’s outline.
    • Continuous Line Drawing: Refine your hand-eye coordination by capturing the subject in a single, unbroken line, a method that fosters a more intuitive drawing process.

    Tips for Masterful Contour Drawings:

    Enhance your technique with these tips:

    • Edge Emphasis: Focus on the edges: Pay close attention to the contours and edges of the subject.
    • Draw slowly: Take your time to carefully observe and capture the details of the subject’s form.
    • The Unbroken Line: Aim to draw the entire subject without lifting your drawing tool from the paper, maintaining a continuous line.
    • Practice regularly: Set aside time for regular drawing sessions to refine your technique.
    • Diverse Subjects: Broaden your artistic horizons by applying contour drawing to a variety of subjects, enriching your portfolio with a range of forms and figures.

    Crafting Your Contour Drawing:

    Begin your contour drawing with these steps:

    1. Select a subject to draw.
    2. Set up your drawing materials, such as paper and a drawing tool.
    3. Take a moment to observe the subject and understand its form and shapes within the form.
    4. Start drawing the outlines of the subject, following its contours closely and using a continuous line.
    5. Resist the temptation to add detail, allowing the contour to express the subject’s form and character.

    Benefits of Contour Drawing:

    Contour drawing offers numerous benefits to artists, including:

    • Sharpened Observational Skills: Develop an eye for detail and form.
    • Enhanced Coordination: Develop a seamless harmony between eye and hand coordination.
    • Simplification of Form: Learn to see and capture the essence of complex subjects.
    • Increased Focus: Develop a disciple to stay focused on the subject and not rush through the drawing.

    Planning Compositions with Contour Drawing:

    Contour drawing can serve as a valuable tool for planning compositions in more detailed artworks. By outlining the main shapes and forms, artists can establish the overall structure and balance of the artwork before adding further details.

    Examples of Contour Drawings:
    Explore other artists drawings either by visiting a museum, a gallery or by finding examples on the Internet. Try to study different types and styles of contour drawing, from simple, minimalist line drawings to more complex and detailed renderings. Each artist and their unique piece is a testament to the artist’s skill and vision.

    Beyond the Basics: Exploring Contour Drawing’s Variations:

    In addition to traditional contour drawing, artists can explore variations and extensions of this technique, such as cross-contour drawing, gesture drawing, and contour hatching, each offering unique approaches to capturing form and texture.

    Essential Tools for Contour Drawing:

    While the essence of contour drawing lies in its simplicity, the choice of toolsโ€”be it pencil, pen, charcoal, or markerโ€”can greatly influence the outcome. Experiment with different mediums to discover the textures and lines that best express your artistic voice.

    Conclusion:

    By continued and persistent practice, you will achieve desirable results in your drawings. By mastering contour drawing you will also explore opportunities for artistic expression and growth. By incorporating exercises, tips, and techniques into your practice routine, you can develop your skills and unlock your creative potential. What are you waiting for? Grab a pencil, some paper and begin drawing!

  • Charles Bargue Plates

    Charles Bargue Plates

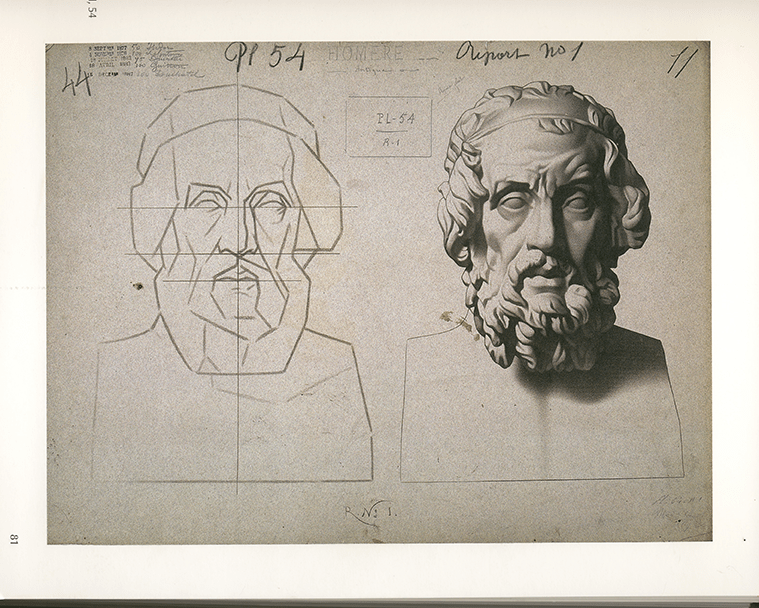
    Here, I present a “forgotten” technique that was popular in the late nineteenth century in academic training. The technique, or rather, training course, was designed by Charles Bargue, a French painter and lithographer (c. 1826/1827 โ€“ April 6, 1883). He is notably known for creating a course that would train artists in the traditional, classical atelier style of drawing.ย 

    It is a common practice in traditional drawing and painting training to copy master drawings. This is meant to give students an understanding of drawing, technique, composition, and aesthetics. During the 20th century, this practice was looked down upon, because it seemed rigid and did not allow students to develop their own styles. However, nothing can be further from the truth. When interest in traditional drawing techniques returned and became more mainstream in artistic circles, people began revising the “forgotten” techniques. The reason I say “forgotten” in parenthesis, is because in some art schools throughout the world, these practices were kept and students, who dedicated themselves to this training have proven to gain a lot of experience and learn. Copying a drawing, or plates, doesn’t mean that you will be locked into a particular style or a way of doing drawing. Instead, you will gain techniques and insight into drawing that will be incorporated into your own, individual style. 

    This is not a required assignment but is highly encouraged. 

    Here’s the Charles Bargue plates pdf. 

    Here’s a good video explaining how to use this technique.ย 

  • Portraiture

    Portraiture

    In the final weeks of the class, we will be focusing on portraiture.

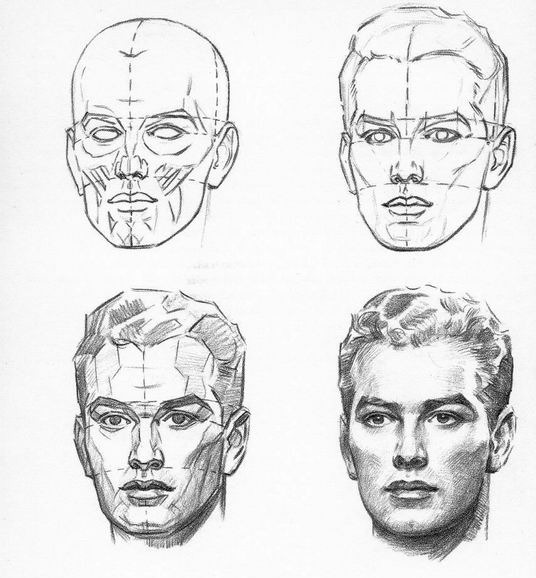
    Portrait drawing, for a beginner, can seem like a difficult task. However, there are tools used by artists that will help you achieve the structure and likeness of any face you are drawing. Although there are similarities in faces and a drawing can begin with a genetic layout, each individual face is different. It is the subtleties and differences that make us individuals. Observing and studying this individuality and translating it to your own drawing will give your portraits not only the likeness, but also character and life. Just like with any other drawing from life, you must pay close attention to the model. Do not draw what you “think” is there, but let the model “tell” you what is there. Here are the questions you should be asking yourself while observing a model: What is the overall shape of the head? How high is it compared to how wide? Is the model looking directly at you (the viewer), or is the head turned away? Where is the vertical line and the horizontal line?

    Start all of your drawings with large, loose shapes and then move to the next largest shapes. You have to go from large to small, from general to specific. If you draw an eye, and it is the most accurate eye but doesn’t fit with the rest of the face, then your portrait will be out of proportion.

    I am providing a pdf excerpt of pages from a book by Andrew Loomis on how to draw head and hands. One of the most useful tools is understanding the construction of the head. There are different methods, but Loomis’s approach has been, perhaps, the most useful and successful. A lot of artists including animators and illustrators, rely on Loomis’s approach to head construction. The reason for that being is that his approach allows for head invention. If you are an animator or an illustrator this can be very useful in creating characters from your imagination. For the next few weeks, we will be studying this approach and applying it to drawing from observation.

  • Planes, form and rendering

    Planes, form and rendering

    Planes, Form, and Rendering: Understanding the Foundations of Artistic Representation

    Welcome to our page on “Planes, Form, and Rendering,” where we delve into the fundamental concepts that form the backbone of artistic representation. This page serves as a guide to understanding these key elements, each vital to the process of creating and interpreting art.

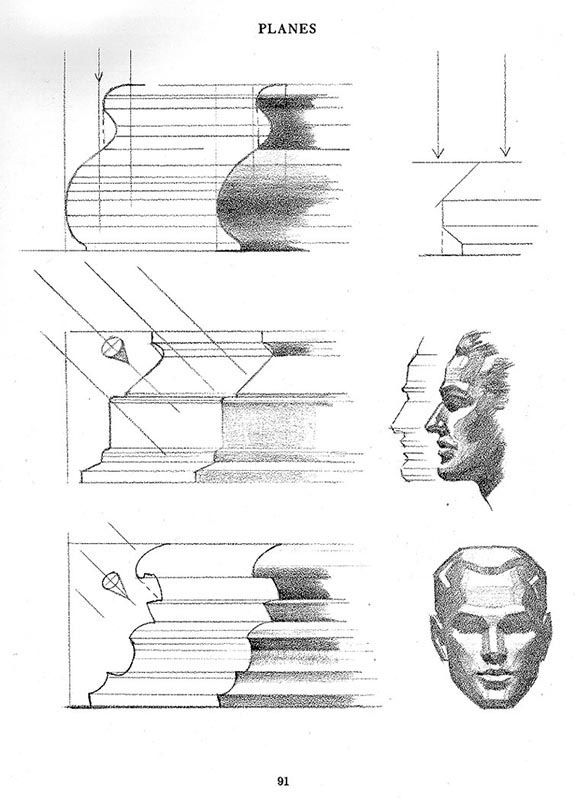
    Planes: In the realm of art, planes are essentially flat surfaces that collectively define the shape and structure of a form. Whether in two-dimensional or three-dimensional art, planes are the building blocks that artists manipulate to create a sense of depth and dimensionality. In two-dimensional art, like drawing and painting, planes are used to represent the various facets of a three-dimensional object on a flat surface, contributing to the illusion of depth. In three-dimensional art, such as sculpture, planes are the literal surfaces that make up the form, each angled uniquely to catch light and shadow, thereby defining the object’s shape and volume.

    Form: Form pertains to the three-dimensional quality of an object, encompassing its volume and the space it occupies. It is the structure or the physical presence of the subject in an artwork. Form is what gives an object its shape and solidity, and it’s perceived through the way planes and contours come together. Understanding form is crucial for artists, as it enables them to create realistic and compelling representations of their subjects, whether in sculpture, painting, or digital media.

    Rendering: Rendering is the artistic process of adding color, shading, texture, and light to the planes and forms, bringing them to life with depth, dimension, and emotion. It is through rendering that an artist conveys the material qualities of the subject, its location in space, and the way it interacts with light. In drawing and painting, rendering involves techniques like shading and highlighting, while in digital art, it can be a complex process involving software and algorithms to simulate realistic appearances.

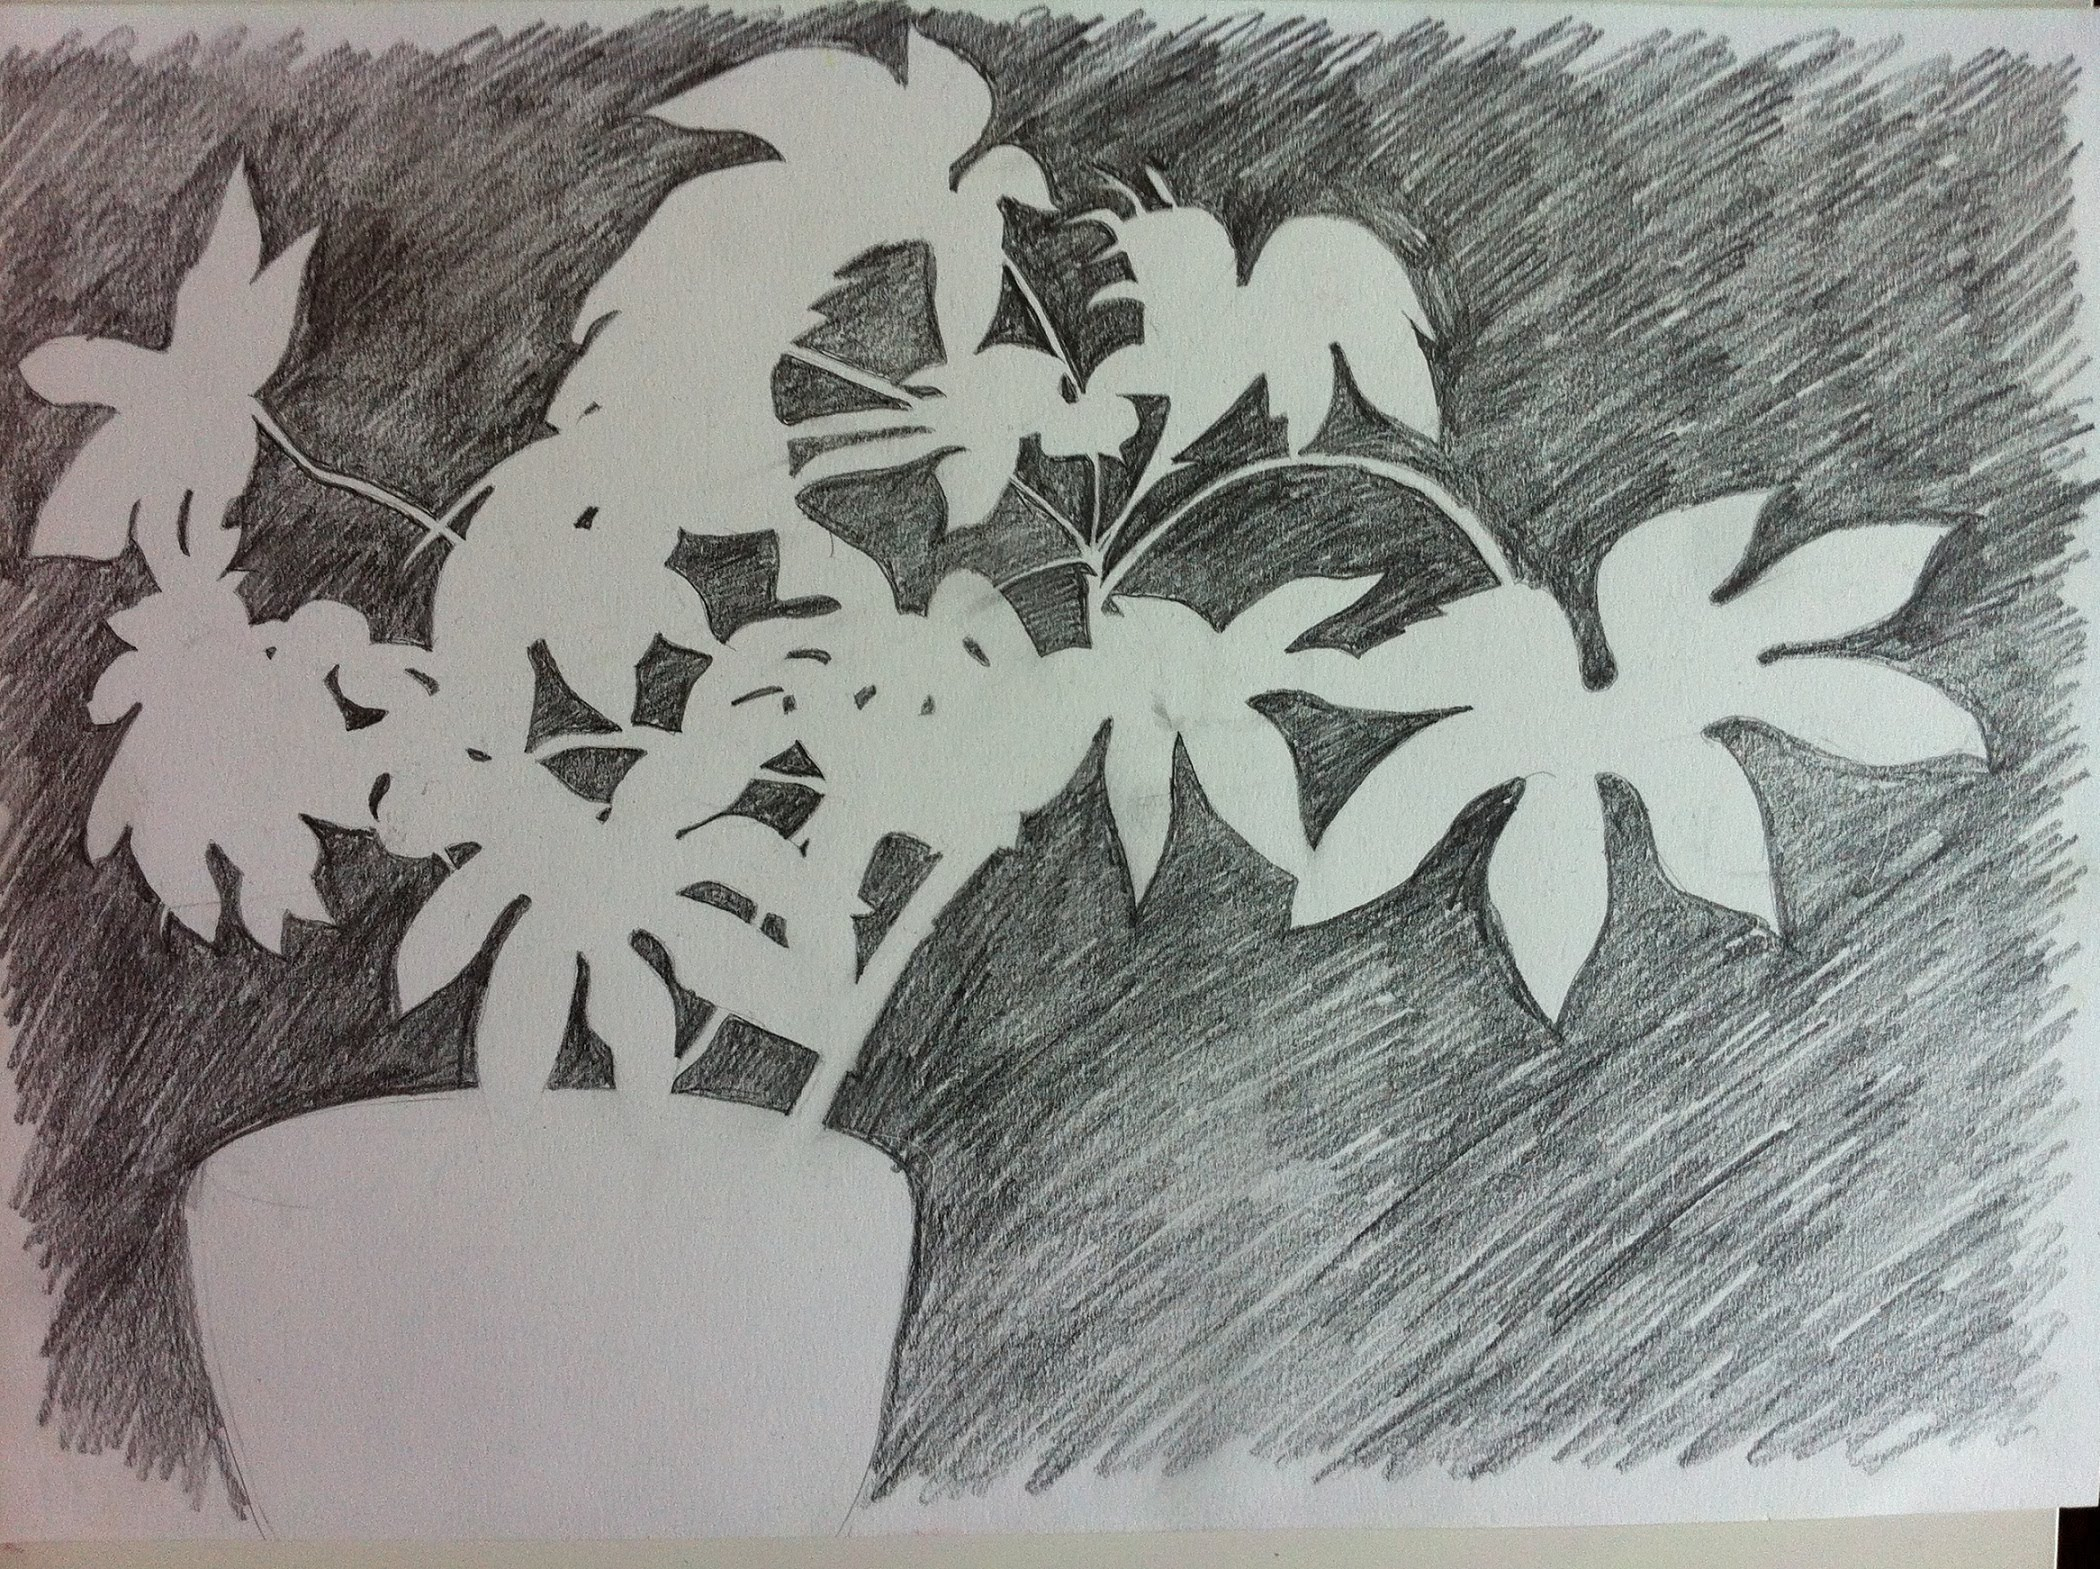
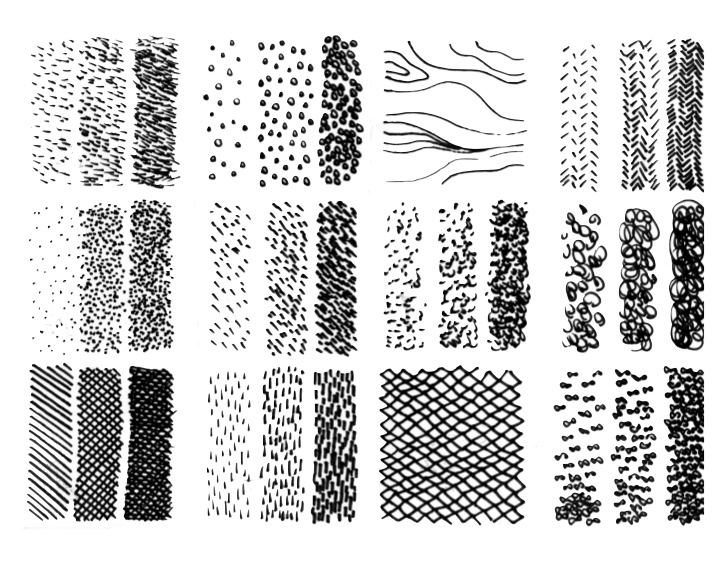
    Shading: In art, shading refers to the technique of varying tones to represent the effects of light and shadow on the surface of an object, thereby giving it a sense of volume and three-dimensionality. Shading is used to enhance the realism of a subject, indicating where light falls and where shadows are cast. It involves the gradation from light to dark across different surfaces and contours of the subject. Different shading techniques, such as hatching, cross-hatching, stippling, and blending, can be employed to achieve various textures and depths. Shading is a fundamental skill in drawing, painting, and digital art, crucial for depicting the way light interacts with forms and for conveying the atmosphere and mood of a composition.

    Through visual examples and detailed explanations, this page aims to provide a comprehensive understanding of how planes, form, and rendering come together to create compelling art. Whether you are an aspiring artist, a seasoned professional, or simply an art enthusiast, these concepts are crucial for appreciating and creating art that resonates with depth, realism, and emotion.

  • Ink and pen

    Ink and pen

     Super User Beginning Drawing 16 April 2019  Hits: 1062 

    Lines and marks

    Pattern 

     Stippling 

    Value scale samples

    DIGITAL CAMERA

    Texture

    Samples